Not everyone wants to spend thousands on a powered system right away. A lot of people start smaller. They want to know if the habit sticks before committing real money. That's where a diy cold plunge comes in. It's cheap. It's simple. And it gets you into cold water within a day or two, not weeks of waiting on a delivery.
This guide walks through what you actually need, how to set it up, and where the limits of a homemade setup start to show. By the end, you'll know whether a diy cold plunge tub fits your situation, or whether it makes more sense to skip straight to a powered unit.
There's no wrong answer here. Plenty of people plunge happily with a stock tank for years. Others use it as a stepping stone before buying something more permanent. What matters is understanding the real tradeoffs before you decide, rather than guessing.
Why People Start With DIY
Cost is the obvious reason. A stock tank and some ice cost a fraction of what a chilled unit runs. But there's a second reason that matters just as much. Commitment. Nobody wants to drop a few thousand dollars on something they might use twice and abandon. A diy cold plunge setup lets you test the habit with almost no financial risk.
It also teaches you something a powered cold plunge tub can't. You learn firsthand what temperature actually feels sharp but manageable for your body. You learn how your own tolerance builds over the first few weeks. That knowledge carries over even if you eventually upgrade to something fancier.
What You'll Actually Need
Building a basic diy cold plunge tub doesn't require much. Here's the core list:
A stock tank, livestock trough, or large plastic tub, sized for full-body immersion while seated
A reliable thermometer, ideally one that clips to the side or floats
Bags of ice, enough to drop the water temperature meaningfully usually several bags per session
A cover or lid, to reduce debris and slow heat gain between uses
A towel and robe kept nearby, ready before you get in
That's genuinely most of it. No electrical work. No plumbing. Just a container, water, and ice.
Choosing The Right Container
Size matters more than people expect. Too small, and you can't submerge properly. Too large, and you waste a huge amount of ice trying to chill more water than necessary. A tank built for one or two adults, roughly large enough to sit with knees bent and water up to your shoulders, tends to hit the right balance.
Stock tanks made for livestock work well because they're built to hold water without leaking and come in sizes that fit most people comfortably. Round galvanized tanks are common and relatively affordable. Oval or rectangular options exist too, and sometimes fit better in a garage or small backyard corner.
Getting The Water Cold Enough
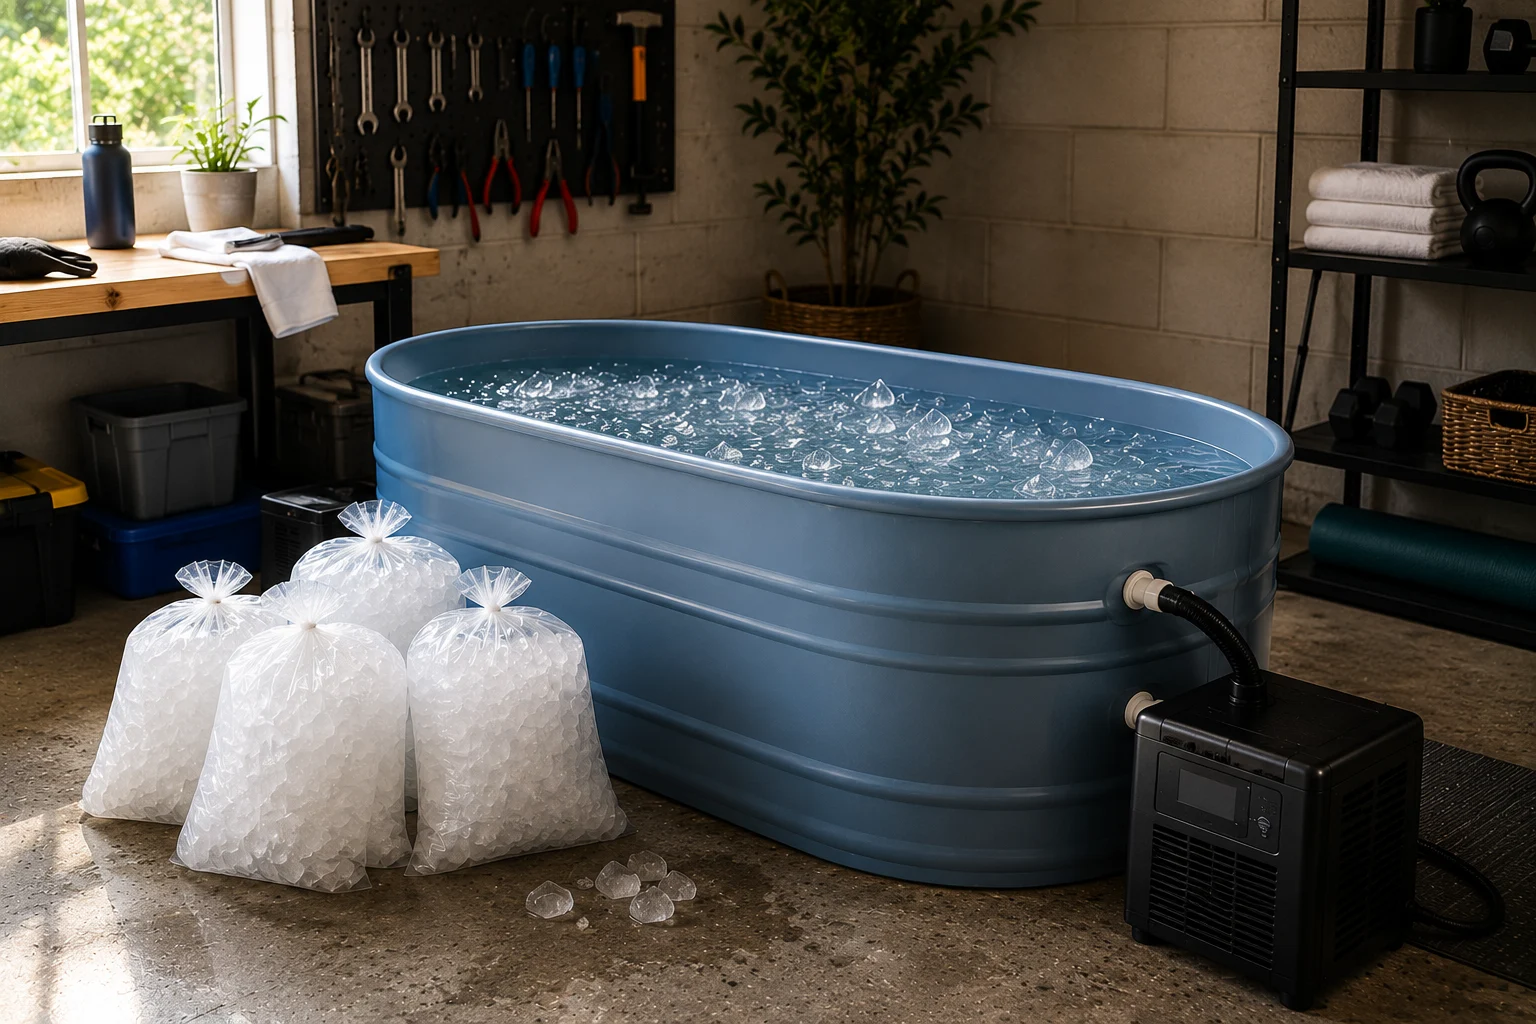
This is where most first-timers get it wrong. They assume a few ice cubes will do the job. It won't. Bringing a full stock tank down to the fifty-to-fifty-nine-degree range that most people target takes real volume, often several standard bags of ice per session, more in warm weather.
A few practical tips make this easier:
Fill the tank with cold tap water first, before adding ice, to reduce how much ice you need overall
Add ice gradually and check the thermometer rather than dumping it all in at once
Keep a few extra bags in a cooler nearby if you're sharing the tub across multiple sessions in one day
Insulating the outside of the tank, even with something as simple as foam board, slows how fast the water warms back up between uses
Knowing how cold should a cold plunge tub be before you start saves a lot of wasted ice. Most people don't need water near freezing. The fifty-to-fifty-nine-degree range delivers the real physiological response without the extra expense and risk of going colder.
Comparing DIY Approaches
Not all DIY setups look the same. Some people go fully manual. Others add a small upgrade that removes some of the daily hassle.
DIY Approach | Setup Effort | Ongoing Effort | Temperature Consistency |
Stock tank + bags of ice | Low, one-time setup | High — ice needed every session | Drifts as ice melts |
Stock tank + pool chiller add-on | Moderate — requires basic plumbing | Low once installed | Fairly steady |
Insulated barrel-style build | Moderate | Moderate | Better than open tank, still manual |
The chiller add-on route sits in an interesting middle ground. It costs more upfront than a plain stock tank, but far less than a fully built powered tub like the ones sold under the Plunge name. It's a reasonable step for someone who's confirmed they'll use the habit regularly but isn't ready for a full commercial system yet.
An insulated barrel-style build sits somewhere else on the spectrum. Some people construct their own version using a food-grade barrel, foam insulation, and a simple drain valve. It takes more effort to build than filling a stock tank, but it holds temperature noticeably better once it's done, and it looks a lot tidier sitting in a garage or backyard than an open plastic tub.
Keeping The Water Clean
Standing water grows bacteria fast, especially once it warms up between sessions. This is one of the most overlooked parts of a DIY setup. Knowing how to clean a cold plunge tub properly, even a homemade one, keeps every session safe rather than just cold.
A few habits go a long way:
Drain and refill the water at least once or twice a week, more often with frequent or shared use
Wipe down the inside walls of the tank regularly to prevent buildup
Keep the cover on between sessions to block debris, leaves, and sunlight, all of which encourage bacterial growth
Consider a small, tub-safe sanitizing product if you're using the same water for more than a few days
Skipping this step is the fastest way to turn a good habit into an unpleasant one. Cloudy, musty water discourages consistent use far more than the cold itself ever does. It's worth building water changes into your calendar the same way you'd schedule anything else recurring, rather than relying on memory alone once the routine gets busy.
Safety Considerations For A Homemade Setup
A DIY tub carries the same core risks as any cold plunge, plus a few extra ones tied to the improvised nature of the setup. Sharp edges on a repurposed container, uneven footing around an outdoor tub, and inconsistent temperature readings from a cheap thermometer are all worth thinking through before your first session.
Never plunge alone during your first few weeks, regardless of setup type. Keep a phone nearby, not submerged, in case you need it. Exit slowly rather than jumping out in a rush, since a sudden change in position after cold exposure can occasionally cause lightheadedness. These precautions matter just as much with a two-hundred-dollar stock tank as they do with an expensive powered system.
Weather-related risks deserve mention too, especially for outdoor setups. A tub left out overnight in freezing conditions can develop a thin layer of ice on the surface, which isn't dangerous by itself but does mean checking the actual water temperature before getting in, rather than assuming it matches your last session. Wet ground around an outdoor tub also gets slippery fast, so non-slip footing near the entry point is worth setting up before your first cold morning session, not after a near-slip reminds you.
Where To Set Up Your Tub
Placement matters more than people expect at first. Outdoor setups need a flat, stable surface and easy access to a hose for filling and draining. A patio, driveway, or backyard corner near a water source usually works well. Indoor setups, like a garage or basement corner, need good drainage planning, since spills and drain-outs happen more often than you'd think.
Sunlight is worth considering too. A tub left in direct sun all day warms up faster between sessions, meaning you'll need more ice to bring it back down. A shaded spot, or a simple cover, helps the water hold its temperature longer and cuts down on how much ice you go through each week.
Common Mistakes People Make
Underestimating how much ice a full session actually requires
Skipping a proper thermometer and guessing at temperature instead
Letting water sit unchanged for too long between sessions
Building or buying a tank too small to submerge comfortably
Placing the tub somewhere without proper drainage nearby for refilling and emptying
Most of these mistakes are easy to fix once you know they exist. They just tend to surprise first-timers who assumed a DIY setup would be simpler than it actually is in practice.
Where DIY Setups Fall Short
A homemade diy cold plunge tub has real limits. Temperature drifts as ice melts, meaning the end of a longer session feels noticeably different than the start. There's no automatic filtration, so water quality depends entirely on how diligent you are about changing it. And the daily ice requirement becomes a genuine chore for anyone plunging more than a few times a week.
These aren't reasons to avoid starting with DIY. They're simply things worth knowing going in, so the eventual decision to upgrade if you make one comes from real experience rather than guesswork.
It's also worth remembering that these limits show up differently depending on climate and season. Someone plunging outdoors in a cold winter region deals with less ice needed but more temperature swing overnight. Someone in a warmer climate burns through ice faster but deals with fewer surprises from ambient temperature. Neither situation is a dealbreaker, but both are worth planning around before you settle into a routine.
When It Makes Sense To Upgrade
Most people who stick with cold plunging for more than a couple of months start noticing the friction of a diy cold plunge tub. The ice runs get old. The temperature inconsistency becomes annoying rather than charming. This is usually the point where a powered system, like those from Plunge or Ice Barrel, starts to make financial sense not because DIY failed, but because the habit proved itself and now deserves less friction.
There's no fixed timeline for this decision. Some people happily run a stock tank for years. Others upgrade within the first month once they realize how often they actually want to plunge. Either path is valid. What matters is that the decision is based on your actual usage, not on what looks impressive in a home gym photo.
Building The Habit Around Your DIY Setup
A diy cold plunge tub works best when it's paired with a routine that doesn't depend on perfect conditions. Deciding on a rough schedule say, three sessions a week before you've even filled the tank the first time helps the habit stick. Waiting until you "feel like it" tends to mean the tub sits empty more often than not.
Some people pair a short DIY plunge with a warm-up beforehand, even something as simple as a few minutes of light movement, which makes the cold feel more manageable and the whole routine easier to repeat. Others treat prep time filling the tank, adding ice, checking the thermometer as part of the ritual itself, rather than a hassle to rush through.
Consistency tends to matter more than perfection here. A slightly-too-warm session done on schedule beats a perfectly-chilled session skipped because the prep felt like too much effort that day. Building the habit around what you'll actually repeat, rather than chasing an ideal setup every single time, is what makes a DIY tub work long term.
The Bottom Line
A DIY cold plunge tub is a genuinely smart way to start. It costs little, requires no special skills, and tells you almost everything you need to know about whether this habit is worth pursuing further. The tradeoffs ice runs, temperature drift, manual cleaning are real, but manageable for most people in the early stages. If the habit sticks and the daily hassle starts to outweigh the savings, upgrading to a system like Plunge or Ice Barrel is a natural next step, not an admission that the DIY route failed.
Frequently Asked Questions
What size tank do I need for a DIY cold plunge?
Large enough to sit with knees bent and water up to your shoulders. Most standard stock tanks work well for this.
How much ice does a DIY cold plunge actually need?
Usually several standard bags per session to bring a full tank into the fifty-to-fifty-nine-degree range, more in warmer weather.
Can I add a chiller to a DIY setup instead of using ice every time?
Yes. A pool chiller add-on removes the daily ice requirement, though it adds upfront cost and some basic plumbing work.
How often should I change the water in a DIY cold plunge tub?
At least once or twice a week, more often with frequent or shared use, to prevent bacterial growth.
Is a DIY cold plunge as effective as a powered tub?
Yes, physiologically. The main difference is convenience and consistency, not the actual cold-water response your body has.