The biggest obstacle to consistent recovery is often inconvenience. The drive to the gym or wellness centre, the packed locker rooms, the scheduling conflicts. Creating a dedicated at-home recovery space removes that friction, turning a chore into a seamless ritual. This is not about luxury, it is about investing in consistency. Before you buy any equipment, a thoughtful plan ensures your space serves your goals from day one.
Foundational Space Planning and Assessment
A successful recovery zone begins with a clear vision, not a shopping list. This initial planning phase is about aligning your space with your wellness objectives to prevent costly oversights. Think of it as creating a blueprint for your well-being. A careful assessment of your home and habits will guide every subsequent decision you make.
Follow these steps to establish a solid foundation for your personal recovery zone design:
- Define Your Recovery Zone's Location. Where will this space live? A basement offers a naturally cool, quiet environment but may require humidity control. A garage provides a durable concrete floor and ample space but might need insulation and finishing. Even a dedicated corner of a spare room or a sheltered outdoor patio can work if planned correctly. Consider noise, privacy, and proximity to essentials like power and water.
- Assess Your Wellness Goals. Why are you building this space? If your primary goal is post-workout muscle recovery, your design might centre around a cold plunge. If detoxification and relaxation are your priorities, you might focus on creating a comfortable spot for an infrared sauna blanket. Connecting your goals to the space ensures you build what you will actually use.
- Conduct an Initial Infrastructure Survey. This is a simple visual check. Walk through your potential location and identify existing resources. Where are the power outlets? Is there a water source nearby? Does the area have any natural ventilation, like a window? This is not a technical inspection but a practical inventory of what you already have to work with.
- Consider the User Experience Flow. Think about how you will move through the space. A common and effective routine is a "recovery circuit," moving from hot therapy to cold therapy. How can you arrange your equipment to make this transition smooth? Planning the flow now prevents a clunky, disjointed experience later.
This strategic thinking ensures the space you build is not just functional but also inviting, making it a place you are drawn to day after day.
Essential Infrastructure for Modern Recovery Technologies

With a clear vision from your initial assessment, the next step is to prepare the foundational "bones" of the room. Modern recovery tools can have specific requirements, and addressing them upfront is critical for safety and performance. This phase of how to build a wellness room moves from abstract ideas to concrete, practical preparations for the technology you plan to install.
Upgrading Electrical Systems for High-Powered Equipment
We have all experienced a tripped breaker from running a microwave and a toaster at the same time. Now imagine the power draw of a temperature-controlled cold plunge. Many high-performance recovery tools, especially those that heat or cool, require more power than a standard outlet can provide. It is often necessary to install a dedicated 220V circuit, similar to what an electric dryer uses. This is not a DIY task. Always consult a qualified electrician to assess your home's electrical panel and safely run new wiring. This protects both you and your investment.
Planning for Water and Drainage
A cold plunge setup at home is a fantastic tool for recovery, but the water has to come from somewhere and go somewhere. For a permanent installation, a plumber can run dedicated water lines and install a floor drain. For more flexibility, you can use a simple hose to fill the tub and a submersible pump connected to a hose to drain it into a nearby sink or outdoor area. Considering the options for our range of cold plunge tubs can help you decide which water management strategy best fits your space and budget.
Ensuring Proper Ventilation and Humidity Control
Water and heat create humidity. Without proper ventilation, that moisture can lead to mold, mildew, and even damage to your equipment or home structure. An exhaust fan, properly sized for the room and vented to the outside, is the best solution. In areas where venting is difficult, a high-capacity dehumidifier can effectively manage moisture levels, keeping the air fresh and the environment healthy.
Choosing Durable and Safe Surfaces
The floor in your recovery zone will inevitably get wet. It also needs to be comfortable and easy to clean. Materials like ceramic or porcelain tile are waterproof and extremely durable. Luxury vinyl plank (LVP) is another excellent choice, offering water resistance with a slightly softer, warmer feel underfoot. Whatever you choose, prioritize a non-slip surface to ensure safety when moving between wet and dry areas.
Selecting Your Core Recovery Equipment
With the foundational infrastructure planned, you can now focus on selecting the tools that will power your wellness routine. The most effective at-home recovery space is built around your specific goals, not just the latest trends. For instance, if you are an athlete focused on reducing post-training inflammation, a cold plunge is a non-negotiable. If your aim is cellular repair and stress reduction, a PEMF mat might be your cornerstone. Many find that a combination of therapies yields the best results.
A powerful routine could involve using an infrared sauna for home use to promote circulation and detoxification, followed by a cold plunge to reduce inflammation and sharpen mental focus. This hot-to-cold contrast is a classic recovery protocol used by professionals. The key is understanding how different modalities work. Some systems, like a cold plunge tub, are central fixtures in your space. Others, like an infrared sauna blanket or a PEMF mat, are portable and passive, allowing you to recover while resting on a bed or floor. This flexibility lets you layer therapies without needing a massive footprint. For those curious about the science, understanding what PEMF therapy is can clarify its role in foundational health. Similarly, comparing the unique benefits of different tools, such as in our analysis of sauna blankets versus PEMF mats, helps in making an informed decision.
To help you choose, here is a breakdown of common recovery tools and their primary applications.
| Recovery Tool | Primary Wellness Goal | Space & Infrastructure Needs | Best For |
|---|---|---|---|
| Cold Plunge Tub | Reducing inflammation, muscle recovery, mental resilience | Significant space, dedicated electrical, plumbing/drainage | Athletes and those prioritizing post-exercise recovery |
| Infrared Sauna Blanket | Detoxification, circulation, relaxation | Minimal space (can be stored), standard outlet | Users with limited space seeking deep relaxation and detox |
| PEMF Therapy Mat | Cellular repair, reducing pain, stress relief | Flat surface (bed/floor), standard outlet, easy storage | Individuals focused on foundational health and chronic pain management |
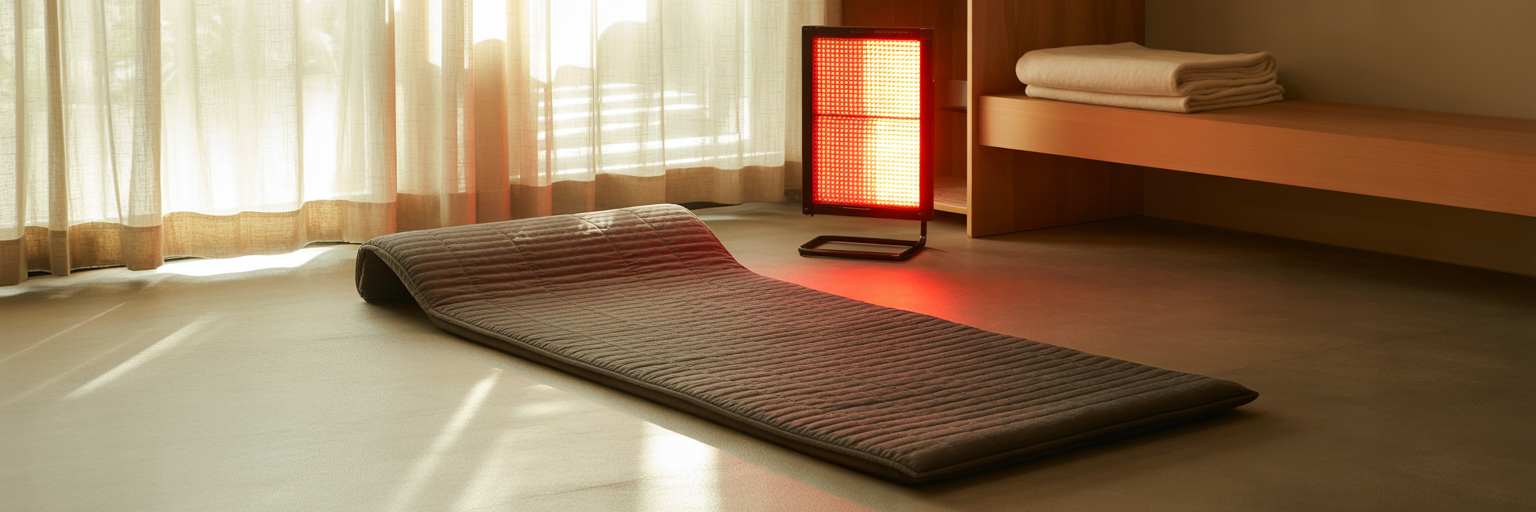
| Red Light Therapy Panel | Skin health, collagen production, muscle priming | Vertical wall space or stand, standard outlet | Targeted treatment for skin, pre-workout priming, and joint health |
Designing a Functional and Serene Layout
You have selected your equipment. Now, how do you arrange it to create a space that is not just functional but also feels effortless to use? The best home recovery room ideas focus on flow and accessibility. The goal is to reduce "activation energy," that small moment of hesitation that can stop a routine before it starts. If your sauna blanket is tucked away in a closet, you are less likely to use it. A thoughtful layout makes your recovery practice inviting.
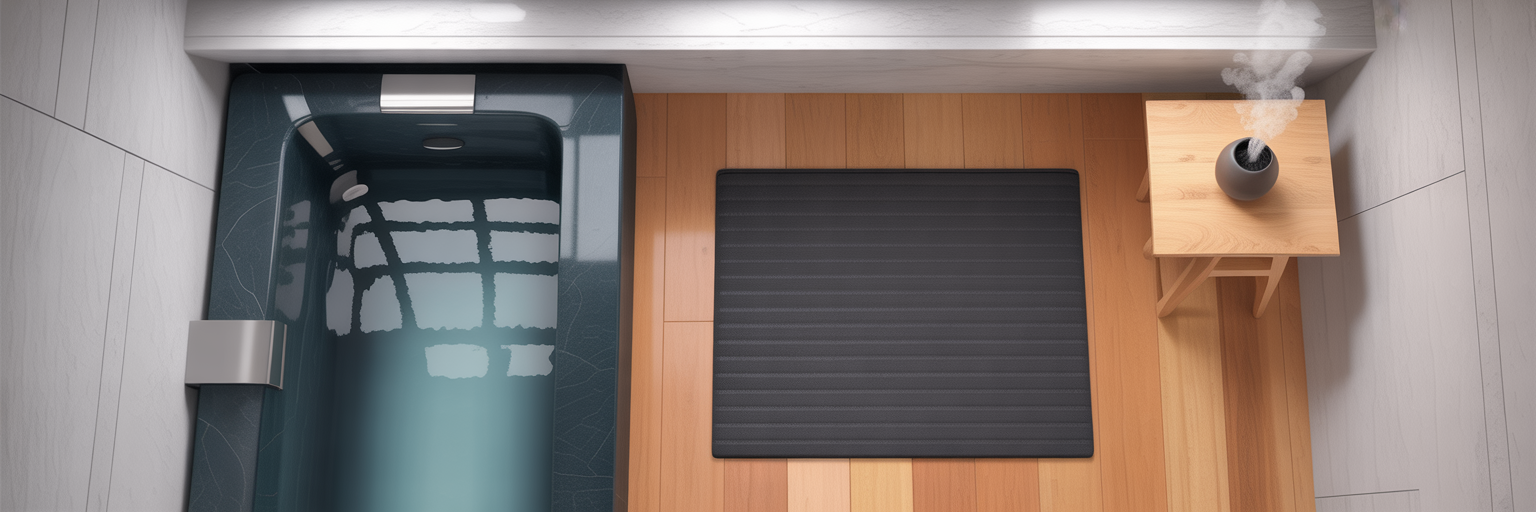
A core concept in effective personal recovery zone design is zoning. By dedicating specific areas for different activities, you create a logical and efficient flow. Consider creating:
- A "wet zone" around your cold plunge, with non-slip flooring and easy access to towels.
- A "dry/hot zone" for your infrared sauna blanket or PEMF mat, perhaps with a comfortable mat or dedicated lounge chair.
- A "relaxation zone" with a comfortable seat, a place for a cup of tea, and perhaps a journal to unwind after your session.
Ergonomics are just as important. Place your red light therapy panel at a height that targets your desired area without awkward stretching. Position outlets and controls within easy reach. Smart storage is not an afterthought but an integral part of the design. Use wall-mounted shelves for cleaning supplies, hooks for towels and robes, and baskets for smaller accessories. Keeping the space uncluttered and organized makes it feel more like a sanctuary and less like a storage room. Finally, think ahead. If you might add another piece of equipment in the future, leave a flexible, open space for it now. This foresight prevents you from having to redesign the entire room later.
Crafting the Ideal Recovery Atmosphere
A functional layout is the skeleton of your recovery space, but the atmosphere is its soul. This is what transforms a room with equipment into a true sanctuary you are eager to retreat to. The right sensory cues can deepen relaxation, enhance focus, and make your recovery time more effective. This part of the process is less about construction and more about curating an environment that calms the nervous system.
Many effective home recovery room ideas centre on engaging the senses in a positive way. Think about how you can shape the experience through:
- Lighting: Avoid harsh, overhead lights. Instead, use layered lighting. Install bright, functional lights on a separate switch for cleaning, but rely on warm, dimmable ambient lighting for your sessions. Smart bulbs are an excellent tool here, allowing you to change color and intensity with your voice or an app. The specific wavelengths used in our red light therapy devices demonstrate how targeted light can be a powerful recovery tool in itself.
- Sound: Silence can be golden, but curated sound can be transformative. A waterproof speaker is a great addition for playing calming music, guided meditations, or specific frequencies like binaural beats designed to promote a relaxed state of mind.
- Aromatherapy: Scent has a direct line to the brain's emotional centres. An essential oil diffuser can fill your space with calming aromas. Scents like lavender are known for relaxation, while eucalyptus can create a spa-like, cleansing atmosphere, especially when paired with a sauna session.
- Focus: Perhaps the most important element is the one you remove. Make your recovery zone a digital-free space. Leave your phone outside the door. This simple act prevents distractions and allows your mind to fully engage in the recovery process, turning off the endless stream of notifications and mental clutter.
Organization and Upkeep for Long-Term Use

You have designed and built your ideal recovery space. The final, crucial step is to establish routines for organization and upkeep that ensure it remains a clean, inviting, and effective part of your life. A space that becomes cluttered or difficult to maintain will quickly fall out of use. The goal is to make maintenance so effortless that it becomes a natural part of your recovery ritual.
To make your investment in how to build a wellness room pay off for years to come, integrate a simple upkeep strategy. A scannable checklist can make this feel manageable:
- Daily Tidiness: After each session, take two minutes to hang your towel, wipe down any wet surfaces, and put away accessories. This prevents clutter from accumulating.
- Weekly Cleaning: Dedicate a short time each week for more thorough tasks. This includes wiping down your sauna blanket or PEMF mat with a gentle cleaner and checking the water quality in your cold plunge.
- Smart Supply Storage: Keep cleaning solutions, test strips for your cold plunge, and fresh towels in a designated, easily accessible spot within the room. When supplies are right where you need them, maintenance feels less like a chore.
- Proactive Maintenance Schedule: Create a simple calendar reminder to check equipment filters, inspect electrical cords, and ensure your ventilation system is running smoothly. This proactive approach prevents small issues from becoming larger problems.
Finally, make the space truly yours. Add a piece of art that inspires you, a plant to bring in nature, or a comfortable robe that makes you feel instantly relaxed. These personal touches strengthen the positive association you have with your recovery routine, turning it from a discipline into a cherished daily ritual. For more ongoing insights, be sure to explore our blog for the latest research and tips on recovery technologies.